Sunday, December 2, 2012

Adventures in Time Lapse


I've recently discovered time-lapse photography. I mean I've always known what time-lapse is, but never thought about it as a still photographer. I guess this is the problem. When you fail to expand your world by thinking that still pictures can only be still pictures, you miss the other possibilities. 

The process of stringing together a bunch still images is certainly not new, this is how all of my favourite childhood cartoons were made. But I never considered trying this with my DSLR until recently.

I came across Trey Ratcliff''s "30 Days and 30 Nights in Queenstown" movie, which is pretty cool. But then I saw brief background on the programs he used and realized that this was all shot with a still camera. You can't help but get inspired by by watching this.


I started doing some Googling and found lots of details on how to shoot time lapse. An important one was having and Interval Shooting mode on your camera. So I grabbed the manual for my D300s and sure enough it has this feature. Note: I never looked for this before because I didn't know to look for it! So I got excited and decided that I needed to try this out. Basically, the interval shooting mode will automatically shoot at a programmed interval for as long you tell it to, or until your memory card is full, or your battery runs out.

Here are a few of the basics that I found... you need to have:
  • A camera with an interval shooting mode. If yours doesn't have this (not all do) you can pick and "Intervalometer" to hook up to you DSLR that will do it for you.
  • A sturdy tripod
  • A program that can export to video (I'm using Lightroom. If your a photographer and you don't have it already, you need to get it for everything that you do.)
  •  And lastly time and patience

There's actually a little more to it, but you don't need anything more than this to give it a try, which is what I'm doing. Now I'm definitely not an expert on this, I just discovered it and wanted share my experience, hence the title "Adventures in Time-Lapse".

This is a really cool technique and I want to try creating something similar. Will my time-lapse look like Trey Ratcliff's above? Ummm, not likely... in fact I'm pretty confident the answer is definitely no. Will I make some mistakes? Definitely yes! Will I learn the right way and wrong way to do things? Probably, but don't underestimate my ability to do it wrong over and over... and over again.

Anyway, I shot my first few series of time-lapse trials recently and I'm currently in the process of some simple editing and compilation. I'll share those pieces in a later post as the adventures continue.

Cheers!

DC

Sunday, November 18, 2012

HDR Workflow Tutorial Video


I created this image earlier this year and posted it along with similar one from the same shoot in an earlier blog post (here).  I always had the intention of creating a "how to" video for the HDR process workflow. Well I finally got around to producing that video over the weekend.

I see HDR as a 3 stage process 1) capture in camera the number of exposures you need/want; 2) merge those exposures together to create the to create the initial HDR image; and 3) finish the image with whatever final adjustments you feel it needs to meet your vision. This video shows a pretty simple and straight forward HDR workflow as there are not any complicated moves. However, I do use a variety of programs and plugins, as you'll see in the video.


Cheers!

DC

Sunday, November 4, 2012

Hamilton Road2Hope Half-Marathon Recap


Note: I know this is a photo blog, but it’s also a personal blog so I’m going to include a few more morsels from one of my other passions, which is running. But if you hold on to end of the post I’ll share a photo tip.

The Hamilton Road2Hope marathon and half-marathon races took place today. The marathon is the number one Boston qualifying race due to its downhill route. Both races traverse the Red Hill Valley Parkway in Hamilton, which is all downhill for about 6km, and the rest of the course is fairly flat except for a few hills between 11 and 13.5k.

My wife and I ran the half-marathon, which was our third race at this distance (21.1km or 13.1 miles). The morning started out rather chilly with the temperature hovering around 1 or 2 degrees C (33 F for my American neighbours) with a little bit of a breeze making the wind chill a bit below the freezing mark. The nice thing was that the start line was at Dofasco Park, which has an indoor recreation centre so we could at least stay a little warmer. 

After arriving at the start area we went through our usual routine, find the porta-potties, get in line, then after go find some place warm for a few minutes, then back out to the porta-potty for one last pit stop before the race! Planning is key here folks! 

The race got started about 10 minutes late, same with the marathon. Not sure why, but since we could wait inside until close to the start time it didn't really bother us too much. Once you’re in the start corral it’s always a bit of an anxious time waiting for the gun to go off, but once you hear the countdown you’re pretty relieved to finally get the show on the road. It felt really good to get moving, especially knowing that you would begin to warm up pretty quickly. It took me about 2.5k before I warmed up. 

The upper part of the course was pretty flat and went for just over 5k before we hit the Redhill Parkway. This is what every runner was waiting for, the downhill! It was really an amazing site to see all of the runners ahead of you winding their way down. It’s not everyday that you get to run on a major highway. I really liked the extra wide passing lane down the left, and you wouldn’t be pulled over for passing on the shoulder either! 

My goal time was to break the 2 hour barrier and I was feeling pretty good, I felt even better when I caught up to, and passed, the 2hr pace bunny at the 8k mark. No offense to her, but as I passed I thought to myself I never want to see you again! My wife asked me what I would have done if she caught up to me again. I said I would have tackled her! Just kidding, but it was motivation enough to keep her behind me for the rest of the race.

I had a race plan and forced myself to execute it to the letter. I have found that in the past if change my plan during the race it results in disastrous consequences. I kept going pretty strong, and never saw that 2hr pace bunny again. I started to slow down during the last 2 to 3k, but kept pushing and came in at 1:57:12, well under my goal time. I was extremely happy with the result. My wife came in at 1:51:10, she totally rocked it!

Huge thanks to all of the race volunteers and the Hamilton Police service for getting all of the runners through the route safely! And can’t forget all of the spectators cheering us on along the way.

Next up is the Disney World half-marathon in January. Looking forward to running with Mickey and friends.

Photo Tip: 
All of these races have photographers along the route so I decided to wear grey...about 18% gray, you know just in case they need some help in correcting white balance! OK - agreed it’s a lame tip, but proper colour balance is critical and you can’t argue with that.

Cheers!

DC

Sunday, September 23, 2012

I Broke a Cardinal Rule of HDR...But Really, It Wasn't My Fault


One of the cardinal rules of HDR photography is to always, always shoot with a tripod...and I always do, except for when I can't...or more importantly when I'm not allowed to.

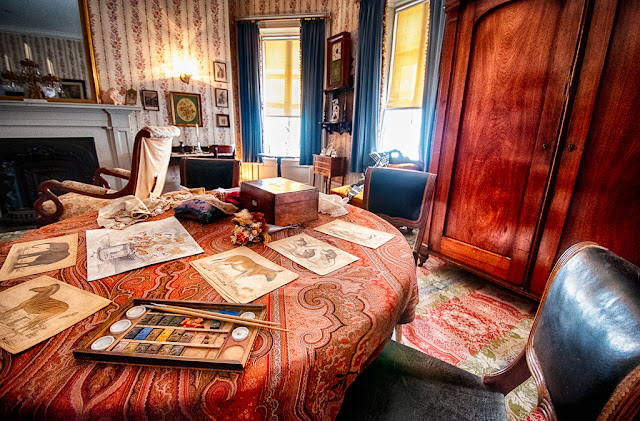
It's obvious that we use a tripod to have a stable platform, especially when shooting multiple exposures for HDR images because we want to minimize any camera movement so all those exposures will align properly in post. However, there are some really great places to shoot, usually inside, that will not allow you to use a tripod or a monopod. Dundurn Castle in Hamilton is one of these places.


I found myself there not too long ago and saw that they do regular tours, but they don't allow tripods (or monopods) as the place is over 175 years old. It's an historical site and preservation is critically important.


So I'm inside, with some really good natural light, but in a number of rooms it was a little spotty. Knowing that I was going inside I immediately thought HDR would be my best bet to draw out all of the tones that a single exposure would leave behind. But without a tripod I had to shoot handheld. This is where things got a little tricky.


I had to raise my ISO to 1600 and sometimes push it a little bit further so noise was going to be an issue. I was shooting a 5 exposure bracket and my wide open exposures were getting up to 1/10th and sometime 1/5th of a sec...yikes! Handheld at 1/10th and 1/5th? That for sure will cause some issues. I was shooting with the Nikon 10-24mm wide angle lens at the 10-12 mm end, as well as bracing myself to walls, doorframes or anything else I could find, so I was hoping that I would be able to get away with a few of those exposures.

I was pleasantly surprised find that I had a few that worked out pretty well. More than I was expecting. However, some were a little soft with the slower shutter speeds...oh well, it wasn't my fault remember?!?


I got to try out Nik Software's HRD Efex Pro 2 for the first time and I'm totally sold on it! I love the new features. Finishing was done with Viveza and Color Efex Pro.

Cheers!

D

Sunday, September 2, 2012

ColorMunki To The Rescue!


First off, since I'm Canadian I have trouble spelling "colour" without the "u", but for the sake of getting the product name correct I'll go along with it...for now :)

As with many photographers I like to work as accurately as I can with my the colour of my images and that means having a properly calibrated display. I have been using a LaCie 321 display with the Blue Eye Pro calibration tool. Up until late last year I had no problems. Using an older Dell Win XP laptop things worked quite well.

What changed? Well, I moved over to a MacBook Pro. This is when I started to have some issues. The old laptop was connected with a DVI cable as that's what is native on the display; however, the Mac is now using the new Thunderbolt port. No problem, I just got the MiniDisplay Port to DVI adapter and the display works as it should, except for when it came time to calibrate. This is where the problems started.

As it was going through it's steps I kept getting an error at the monitor connection stage prior to measuring the colour patches. This was strange because the Test and Report feature was able to measure and report on the current settings without an issue. So it became troubleshooting time. Downloaded the updated software for the Mac OS, didn't work. Next I contacted LaCie and set up a service ticket and was pointed to a newer update as OS Lion was still new... it didn't work. It was interesting to note that this newer update was released about 6 months before Lion was launched... is it compatible with OS Lion? Who knows?

After a lot of back and forth with LaCie service I was told it was the Thunderbolt port that was not compatible with the DVI connection on the display as it could not translate the necessary information. Just for fun I tried calibrating the display on my laptop to see if that would work. Low and behold, I get the same error, which tells me that it's probably not the Thunderbolt connection issue as it was not in play. Anyway, the problem was never really resolved. I still think it's a software issue that was never made compatible for OS Lion. So basically it was either buy a new display or try a new calibration tool...both expensive options.

I decided that lesser of 2 evils was to try a new calibration tool first. If it didn't work then it would be time to get a new display, but I would still need a good calibration tool anyway.

Enter ColorMunki Photo... problem solved! It worked regardless of the Thunderbolt adapter connection issue.

I can't remember an easier piece of software, and hardware, to use. Set-up was dead simple and it walks you through all of the steps required to calibrate your display and create a printer profile. You have the option of letting the program set all of the settings for you, or you can take the more advanced route of configuring it to your own settings. A nice feature of the advanced route is that you can use the ambient  light sensor to take a luminance value of your work space and identify the appropriate luminance level for your display.

Did I mention that it worked? Even with the same adapter through the Thunderbolt port? Needless to say I was pretty happy. Granted the ColorMunki Photo is not cheap, but it's still only a 1/3 the price of a decent display. So I was hedging my bets on this one and it turned out in my favour.

Now, this highlights an ever present issue of upgrading your gear whether it's a new computer or an OS update. I expected that I would need to update a lot of programs and drivers for some older gear when I moved to a Mac, and in some cases just bite the bullet and buy the latest (as in this case). You really need to do a lot of research when upgrading so that you know what will work, but especially what won't work.

So if you're in the market for a display calibration tool I would highly recommend the Color Munki. You can check them out here www.colormunki.com

Cheers!

DC

Monday, August 13, 2012

Waterfall Scouting

I haven't been out shooting for a little while so I decided to take a little bit of time yesterday to seek out one of the many waterfalls in my area. This one is just off the Bruce Trail, as pretty much all of the waterfalls are around here, on the Sleepy Hollow Side Trail... so I'm guessing that this is the Sleepy Hollow Falls.

Pretty simple setup using a Nikon D300s and 24-70mm f2.8. A tri pod is crucial as the shutter speeds are slower to get the silky look in the water. I used the Singh-Ray Vari ND filter as I needed the extra stops to get the slower shutter speeds. This filter gives me between 2 to 8 stops of neutral density, which allows a lot of control.

Landscape orientation:


I always like to do a portrait orientation for a different perspective. You never know which one you may like the best:


There's always the smaller run offs as you get further from the main falls. These are fun to shoot as there a usually many levels of drop off:


Enjoy!

DC

Sunday, May 6, 2012

Lightroom Sharpening Quick Tip Video Tutorial

Here's another video tutorial with a quick tip on how to use Lightroom's Sharpening tool to dial in the right amount of edge sharpening and avoid having too much sharpening in the overall image. Great little tip for quick edits or quick portrait retouching.


Enjoy!

DC

Saturday, April 14, 2012

Long Exposures at Oceanside Pier

When I was down in Southern California back in March one of the objects of my attention was the Oceanside Pier. Not only because there's a Ruby's at the end of it, but because we don't have piers like this back home. I don't live near the ocean, and although I'm right on Lake Ontario I haven't found a scene like this, yet.


I knew when I was heading down that I wanted to try some long exposures. I have the Singh-Ray Vari-ND (neutral density) filter which offers anywhere between 2 to 8 stops of density; long exposures is what this filter was made for. Once I got to the pier I found a spot to set up and began working out a composition. I like to keep my compositions simple so I landed on the one you see in the image above. I took a number of exposures, including some bracketed sets for an HDR version which I'll share in another post. I was lucky to have had some clouds, which always works nicely with long exposures. The image above was shot at f22 with a shutter speed of 85 seconds.

After shooting the image above I wanted to shoot directly underneath the pier for a completely different perspective. However, the tide was up and the rocks under the pier were washed over and there wasn't really a safe way for me to set up, so I had to pack it in and come back another time. I made it back a couple of days later and this time I was able to get beneath the pier to set up to shoot the image below. Same idea here, using the Singh-Ray Vari-ND and my camera in manual mode, I set my aperture at f22 for maximum depth of field and held on for a 41 second exposure.


If you haven't done a long exposure before you need a few key pieces of equipment: camera that has a "bulb" option on the shutter speed (all dslr will have this); a tripod is a must, with the shutter open for that amount of time any amount of shake will blur the shot; a neutral density filter, cuts the light entering the lens allowing you to keep the shutter open for longer; and finally a remote cable release to trigger the shutter without shaking the camera. All of these things together will help with the technical aspects of making the shot, but you also need a good scene.

Both images here were initially processed in Lightroom and the black & white conversion was done using Nik Software's Silver Efex Pro 2.

Cheers! DC

Sunday, April 1, 2012

Video Tutorial - Overview of Nik Software's Viveza 2

This is the next instalment of my video tutorial series. In this video I provide an overview of Nik Software's Viveza 2 plugin. Easily one of my favourite plugins for Lightroom and Photoshop.


Enjoy!

DC

Monday, March 26, 2012

This is Mari, and This Time it Was Her Turn


So, two years ago I was in San Diego visiting family when my wife's uncle asked me to help out with some photography for one of his friends. At that time it turned out to be his friends daughter's Bat Mitzvah; her name was Halle. Well that experience got me invited back again this year for Mari's Bat Mitzvah.

I was really happy to be asked back to shoot this for Mari and her family. They have to be one of the nicest families that I have ever met and the camera just loves them. Now since I had the experience from 2 years ago I was a little more comfortable in that environment. I knew pretty much where I needed to be, but the Rabbi (the same one from two years ago) was again ever helpful in providing some good direction.

I was able to work with both a D300 and D700 so I had the wide angle on one and a longer lens on the other. Other than a few technical difficulties with my 2 SB900's, battery issues with fresh batteries and for the first time ever I set off the thermal cutoff alarm (seriously I thought it was my phone at first). But we persevere, and mildly curse our equipment (okay and ourselves, too).

Anyway, here are some of my favourite shots.

Enjoy!

DC


Sunday, March 18, 2012

Video Tutorial - Lightroom Post Crop Vignette Tool

I've been pulling together some basic video tutorials that focus on my workflow and some of the tools that I regularly use. The first one produced is a tutorial on Lightroom's Post Crop Vignette Tool.


Enjoy!

DC

Monday, March 5, 2012

Children's Pool - La Jolla, California

I was back in Southern California over the weekend and took the opportunity to head down to check out the seals at the Children's Pool in La Jolla. Now, it has probably been about 4 or 5 years since I was last there and at that time the beach area was filled with hundreds of seals; it's a really amazing sight to see that many seals lounging around.  However, I was disappointed this time as there were really only about 10 on the beach, but then I also noticed that there were people on the beach, too!


I came to learn that since the last time I was there it has been turned into a "shared use" beach. Now this creates some problems... as soon as people step foot on the beach the seals scatter. As well, since these are wild seals mothers will protect their pups. There's also a lot of controversy around the beach as well.


Back in 1931 Ellen Browing Scripps funded the building of the sea wall that protects the beach from the sometimes rough ocean. The intent was to create a place for children to play and enjoy while being protected by the waves. Once the sea wall was complete it was gifted to the City of San Diego with the understanding that it would be used as s public park, children's bathing area and general playground.

Not too far away from the Children's Pool was Seal Rock, home to a large seal population that was designated as a wildlife reserve. However, at sometime between 1994 and 1996 the seals began to migrate over to the beach at the Children's Pool. Not long after that seal pup births were noticed on the beach.


So here's where the controversy entered... the large population of seals deposit a large population of excrement, and as a result the beach was closed to swimming for health concerns, then the obvious discussions began about whether the seals should be removed. This would eventually end up with 2 camps, those for public use of the beach, and an advocate group to protect the seals. Needless to say that these 2 groups don't necessarily get along.

A number of legal battles have been waged, but no one has come up with a suitable solution. While I was there I had someone thank me for using a telephoto lens as opposed to going down on the beach to get a closer shot (he was obviously on the seal side). There are regular seal advocates that are looking out for the welfare of the animals on a daily basis, and in the past both sides have gotten a little heated more than once. It really seems to be a no win situation for everyone.


My take, because I usually always have an opinion on most things, is that the beach should be left for the seals only and it should be a continuous marine wildlife reserve. I mean really, it's Southern California and there are tons of beaches to choose from, so why some people feel the need to assert themselves to take over the beach is beyond me. Leave the seals be and enjoy the other beaches that are available.

Cheers!

DC
Saturday, February 25, 2012

Snapseed for iPad - Quick Review

I thought that I would do a quick overview of Nik Software's Snapseed app for the iPad. I was a late adopter of the iPad 2; however, I had heard a lot of good things about Snapseed. It was Apple's iPad app of the year for 2011, which says a lot. But even without that accolade the fact that it's from Nik Software should tell you that this is one powerhouse of an app. It's normally $4.99 in the App Store, but I was lucky enough to spot a few Twitter posts on Valentines Day indicating that it was free for on that day only, so grabbing it was a no brainer. But still, $4.99 is a steal for what you get.


So here's a quick overview of what you'll find with Snapseed:

Auto Correct - no thinking required - auto colour and contrast adjustments
Selective Adjustments - talkin' bout control points here...on your iPad... very cool... brightness, contrast and saturation (wish there was a structure option here, too, but alas not yet)
Tune Image - brightness, ambiance, contrast, saturation and white balance
Straighten - self explanatory
Crop - self explanatory
Details - sharpening and structure (both are global adjustments - would love to see these as selective adjustments in a future update)
Black and White - brightness, contrast and grain (combine this with the selective adjustments and you get a mini Silver Efex Pro 2)
Vintage Films - variety of styles and textures along with adjustments for brightness, saturation, texture strength, centre size (vignette), style strength
Drama Filter - variety of styles with filter strength and saturation adjustments
Grunge Filter - styles that range from 0 to 1501 plus texture options, centre size (vignette) that can be placed anywhere also includes brightness, contrast, texture strength and saturation adjustments
Centre Focus - like a vignette with blur where you can control the size and placement
Frames - variety of frames with width and offset adjustments
Tilt Shift - simulates a tilt shift lens

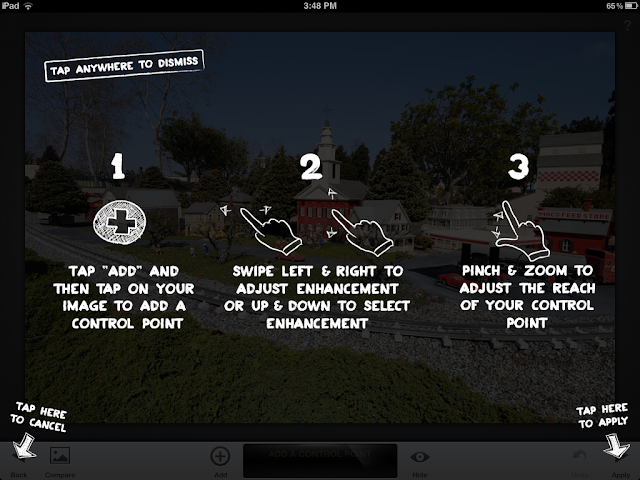
Overall, it's an extremely powerful and very intuitive app. When you launch each filter you get an opaque screen overlay with the instructions and everything uses normal iPad screen gestures. There's a ? in the upper right hand corner of each filter if you need to pull up these instructions again, but after a few times through it you'll be a pro.


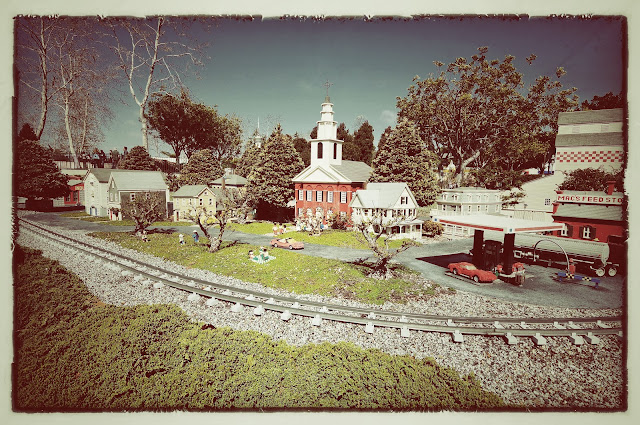
Snapseed is a great app for travelling light. Last weekend I was down near San Diego to visit family and took my camera along with my iPad. We spent some time at Legoland (the family that is, but my camera did accompany us) and I grabbed some shots of the miniatures. I spent some time after that playing around with the myriad of creative options that Snapseed offers. Below are few examples that are amazing on two levels: 1) that Snapseed is an awesome app; and 2) that all this stuff was built with Lego!

Original file (jpeg version of the untouched RAW file - that's right, it works with RAW files)


After Tune Image and Selective Adjustments


Vintage Filter + Frames


Original file


Black and White + Frames


Enjoy!

DC

Sunday, February 5, 2012

Think Tank Photo Airport International v2.0 Rolling Bag Review

Okay, so this week I thought I would take a different approach and throw out my first ever video review, and what better than to take a look at the awesome Think Tank Photo Airport International v2.0 rolling case. You also get a change to see what's in my bag.


Enjoy!

DC


Monday, January 23, 2012

How to Know What Edits to Make?

Now there's a really good question. It's something that I still struggle with for every image that I edit. I've mentioned before that I consider myself a forced creative, in that I mean that creativity is something that I really need to work at to achieve as opposed to being naturally creative. So when I look at editing my images I need some structure to keep me on track.

Before I shoot a scene I try to get an idea of what I want the finished output to look like (the operative word here is "try"). Will it make a good black and white? Does it have a lot of colour that I want to make vibrant? Would HDR be a good choice?  This is typically my starting point so that when I upload into Lightroom, where my workflow starts, I already have a pretty good idea of what I want to do.

So here's a brief overview of my workflow and how I break things down for a little bit more structure. I tend to take threefold approach which consists of 1) global adjustments; 2) selective adjustments; and 3) finishing adjustments. Here's what that looks like:

Global Adjustments:

White Balance: Is the image too warm or too cool? Or is there a colour cast? White balance is a good place to start. Auto WB works pretty well on most advanced DSLRs, but sometimes it take a lunch break.

Exposure: Is the image too light or too dark? Whether you set the exposure yourself, or let the camera do it, in some cases they can both be wrong. This is where I use the histogram and clipped highlight/shadow warnings. Try to make sure that you don't have any data leaving the left and right sides of the histogram.

Contrast: Done with either the Contrast slider or the Curves tool. I shoot in RAW format which means that there's no processing done by the camera so a little initial contrast boost can help.

Sharpening: Again working with RAW files means that there's no initial sharpening so I typically do a little bit in Lightroom. However, I always do final sharpening a little later on in my workflow.

Noise Reduction: My ISO is never the same for every image, and sometimes even my lowest ISO setting can show some noise.  I always take a quick look and add some noise reduction if necessary. Lightroom has pretty good tool for this.

Selective Adjustments: (These are different for every image, but here's what I look for)

Distracting Elements: Is there anything that needs to be removed? Something that you didn't see in the viewfinder? This is where learning to use the variety of tools in Photoshop can help like the Clone Stamp; Healing Brush; and my personal favourite, Content Aware Fill.

Light or Colour Adjustments: Enhancing specific areas of the image with colour or light. This can help draw the viewers eye into the image directing it to where you want by lightening certain areas and  darkening others. Lots of ways to do this with the layer adjustments, layer masks and the brush tool. However, my favourite plug-in for this is Nik Software's Viveza 2.

Contrast Adjustments: I find myself more often than not making selective contrast adjustments to certain areas of an image to bring out more detail. Similar to colour and light adjustments these are done with layer masks and the brush tool.

Selective Sharpening: Things that have a lot of edges can take a fair amount of sharpening; however, if you also have softer areas in the image, you definitely don't want to apply to same amount of sharpening. Portraits are a good example, you want smooth skin, but sharp eyes, so you would only apply sharpening to the eyes in this case.

Finishing Adjustments: (I'm typically back in Lightroom for these)

Vignette: I like vignettes, some people don't, but I do so I add them to pretty much every image. Sometimes it just a slight effect, but it's a nice finishing touch.

Exposure: This kind of bookends my workflow. I'm not sure when I started doing this, but usually after applying the post crop vignette I like to bump the exposure up just slightly to offset the edge darkening that creeps into the centre of the image. Exposure does this a little better than the Feather slider so it's a bit of a balancing act for me.

So there you go. A little peek into my workflow and how I approach my editing. It's taken me a while to get a clear focus on this and it's something that has developed over time. Your workflow may be similar or it could be totally different. All I know is that this works for me. In the end, only you can decide for yourself what is going to work best for you, but if you're still struggling I'll offer these 2 final tips:

1) Learn as much as you can about various Photoshop techniques. Learn the most widely used tools, and learn about using layers and layer masks; and

2) Seek out photographers who are creating the images that you really like. Try to learn how they process their images. With YouTube, blogs, Twitter and other social media options it's not as difficult as you may think find a tutorial or to connect and ask a question.

Sometimes we don't think about the edits that we could, or should be making, because we don't know how to do them, which can become a vicious little circle. So hang in there, learn lots and try new things.

Cheers!

DC

Sunday, January 15, 2012

My Love / Hate Relationship with HDR


I've had a love/hate relationship with (High Dynamic Range) HDR photography for a while now. I love it when it's done well as you can pull out a tremendous range of tones and detail. I love how they can be gritty and edgy (and halo free), and I also love when they have that silky smoothness. It's the simple beauty of HDR done really well.

On the flip side I hate it when I see HDR poorly done, and truth be told I have done some pretty horrible HDR myself, so another point for the hate side of the column is that I have not been able to create HDR images anywhere near the level of those that I look up to.

All that being said I'm now sliding more over to the love side as of late. Giving due credit to folks like RC Concepcion from Kelby Media Group, and Trey Ratcliff over at Stuck in Customs, who are not only tremendous HDR creationists, but also failingly gracious with their teachings and musings on the subject. In a very short time of following their HDR work I can now say that things are making more sense to me.


Now I've written a few HDR posts on the blog starting back in March 2010 and followed up with a couple of revisits later on in the fall of that year. I still stand by what I wrote then, but personal development is continuous, and what a difference a couple years can make. When I first tried HDR I studied up on how to shoot bracketed frames and then grabbed Photomatix to merge and tone map the images. My understanding at the time was capture in camera, merge to HDR in Photomatix and you're done. But boy, was I naive! I missed the most critical and creative step, which is finishing the image.


It's extremely important to spend some quality time figuring out what you want the final image to look like, and also knowing how to get there. This is something that I think comes with time and experience, but the more you do it the better you'll get. Also, by following others who really know what they're doing you can see how they approach finishing an image and you can then begin to develop your own style and ideas. I love video tutorials exactly for this reason. How are they creating a certain look and feel, is it a Photoshop or Lightroom technique or certain software plug-ins? There's no shortage of tools and techniques out there, you just need to find what works for you.

So at this point I'm happy to say that I am beginning to leave more of the hate behind me as I now understand HDR photography a lot more, and I'm getting better at making some of those finishing decisions.

So keep an open mind and always look for new way to develop your skills; the results can only get better over time.

Cheers!

DC

Monday, January 2, 2012

Canadian Photographers Who Travel With Their Gear

If you're a Canadian photographer who travels with their gear, and you don't know what a Form Y38 is then keep reading... I'm going to hazard a guess that if your a professional photographer who travels then you may already be aware of this. (Note: I know that some readers of my blog are live in other countries so naturally this form and process will not be relavent to you. However, I would bet that your country has a similar process that would be worth investigating).

A Form Y38 "Identification of Articles for Temporary Exportation" is a document issued by the Canada Border Services Agency (CBSA). If you haven't heard of this before I'm not surprised. I had never heard of this form until earlier this year after driving back across the border from a trip to the US.

I went down to St. Louis to see the Flashbus Tour featuring Joe McNally and David Hobby back in April. I live in Ontario fairly close to the Niagara Falls border and regularly fly out of Buffalo due to cheaper flights. As usual when I travel I take some of my camera gear, and have done so for over 6 years with nary an issue. On this occasion it was a little different. When I returned to cross back into Canada I expected the usual questions, where have you been, how long have you been gone, what are you bringing back etc. I'm always honest with the CBSA agents as that just makes sense. So when I said that I was attending a photography seminar (the Flashbus Tour) I was questioned about my camera gear; essentially how do they know that I didn't just buy all this stuff in US, and can I prove that I had it before I left?

I showed the CBSA agent the gear I had with me, and after additional questioning she relented, but told me that I should have had a Form Y38 filled out before I left Canada. Suffice it to say I was a very bad person for not knowing about a form that no one in the past had ever mentioned to me; but we all know ignorance is not defence. I guess she thought I was honest enough because her attitude changed slightly and she explained it to me in more detail.

After I got back I went searching for a little more information on how to do this. It's a pretty simple process. Here's all you need to do:

1) itemize all of your gear, I mean all of it, with make, model and most importantly serial number;
2) take all of you gear, plus your full list to your nearest CBSA office (click here for a directory);
3) explain to them that you travel frequently with your camera gear and understand that a Form Y38 can help when coming back into Canada.

In my case I went to the Hamilton International Airport as it was closest and not that busy. The agent there was extremely friendly. He took my list and did a spot check of my gear and serial numbers. He filled out the Form Y38 (it's a small green card) and attached it to my list, where he also noted the number of items and that he had checked the serial numbers. He signed it, I signed it, and we were done. It took about 5 minutes.

The Form Y38 does not have an expiry date so it's good for as long as you have your gear. Even if you only travel with a few pieces, as long as they're on the list covered by the Form you're still okay. The only caveat is if you add more gear or change things out you will need to get a new one. Oh, and you need to remember to carry it with you when you travel.

So it may seem like a bit of an inconvenience to do this, but consider the alternative... getting into a dispute with a CBSA agent, getting pulled off to the side for further questioning, having to pay duty on your own gear, having to gather all of your receipts after the fact and head back to a CBSA office anyway to prove your gear belongs to you. I know I may be exaggerating just a little, but how much easier would it be to drop a Form Y38 on them once they start to question you? You'll probably look like a pretty smart cookie.

Cheers!

DC