Sunday, December 2, 2012

Adventures in Time Lapse


I've recently discovered time-lapse photography. I mean I've always known what time-lapse is, but never thought about it as a still photographer. I guess this is the problem. When you fail to expand your world by thinking that still pictures can only be still pictures, you miss the other possibilities. 

The process of stringing together a bunch still images is certainly not new, this is how all of my favourite childhood cartoons were made. But I never considered trying this with my DSLR until recently.

I came across Trey Ratcliff''s "30 Days and 30 Nights in Queenstown" movie, which is pretty cool. But then I saw brief background on the programs he used and realized that this was all shot with a still camera. You can't help but get inspired by by watching this.


I started doing some Googling and found lots of details on how to shoot time lapse. An important one was having and Interval Shooting mode on your camera. So I grabbed the manual for my D300s and sure enough it has this feature. Note: I never looked for this before because I didn't know to look for it! So I got excited and decided that I needed to try this out. Basically, the interval shooting mode will automatically shoot at a programmed interval for as long you tell it to, or until your memory card is full, or your battery runs out.

Here are a few of the basics that I found... you need to have:
  • A camera with an interval shooting mode. If yours doesn't have this (not all do) you can pick and "Intervalometer" to hook up to you DSLR that will do it for you.
  • A sturdy tripod
  • A program that can export to video (I'm using Lightroom. If your a photographer and you don't have it already, you need to get it for everything that you do.)
  •  And lastly time and patience

There's actually a little more to it, but you don't need anything more than this to give it a try, which is what I'm doing. Now I'm definitely not an expert on this, I just discovered it and wanted share my experience, hence the title "Adventures in Time-Lapse".

This is a really cool technique and I want to try creating something similar. Will my time-lapse look like Trey Ratcliff's above? Ummm, not likely... in fact I'm pretty confident the answer is definitely no. Will I make some mistakes? Definitely yes! Will I learn the right way and wrong way to do things? Probably, but don't underestimate my ability to do it wrong over and over... and over again.

Anyway, I shot my first few series of time-lapse trials recently and I'm currently in the process of some simple editing and compilation. I'll share those pieces in a later post as the adventures continue.

Cheers!

DC

Sunday, November 18, 2012

HDR Workflow Tutorial Video


I created this image earlier this year and posted it along with similar one from the same shoot in an earlier blog post (here).  I always had the intention of creating a "how to" video for the HDR process workflow. Well I finally got around to producing that video over the weekend.

I see HDR as a 3 stage process 1) capture in camera the number of exposures you need/want; 2) merge those exposures together to create the to create the initial HDR image; and 3) finish the image with whatever final adjustments you feel it needs to meet your vision. This video shows a pretty simple and straight forward HDR workflow as there are not any complicated moves. However, I do use a variety of programs and plugins, as you'll see in the video.


Cheers!

DC

Sunday, November 4, 2012

Hamilton Road2Hope Half-Marathon Recap


Note: I know this is a photo blog, but it’s also a personal blog so I’m going to include a few more morsels from one of my other passions, which is running. But if you hold on to end of the post I’ll share a photo tip.

The Hamilton Road2Hope marathon and half-marathon races took place today. The marathon is the number one Boston qualifying race due to its downhill route. Both races traverse the Red Hill Valley Parkway in Hamilton, which is all downhill for about 6km, and the rest of the course is fairly flat except for a few hills between 11 and 13.5k.

My wife and I ran the half-marathon, which was our third race at this distance (21.1km or 13.1 miles). The morning started out rather chilly with the temperature hovering around 1 or 2 degrees C (33 F for my American neighbours) with a little bit of a breeze making the wind chill a bit below the freezing mark. The nice thing was that the start line was at Dofasco Park, which has an indoor recreation centre so we could at least stay a little warmer. 

After arriving at the start area we went through our usual routine, find the porta-potties, get in line, then after go find some place warm for a few minutes, then back out to the porta-potty for one last pit stop before the race! Planning is key here folks! 

The race got started about 10 minutes late, same with the marathon. Not sure why, but since we could wait inside until close to the start time it didn't really bother us too much. Once you’re in the start corral it’s always a bit of an anxious time waiting for the gun to go off, but once you hear the countdown you’re pretty relieved to finally get the show on the road. It felt really good to get moving, especially knowing that you would begin to warm up pretty quickly. It took me about 2.5k before I warmed up. 

The upper part of the course was pretty flat and went for just over 5k before we hit the Redhill Parkway. This is what every runner was waiting for, the downhill! It was really an amazing site to see all of the runners ahead of you winding their way down. It’s not everyday that you get to run on a major highway. I really liked the extra wide passing lane down the left, and you wouldn’t be pulled over for passing on the shoulder either! 

My goal time was to break the 2 hour barrier and I was feeling pretty good, I felt even better when I caught up to, and passed, the 2hr pace bunny at the 8k mark. No offense to her, but as I passed I thought to myself I never want to see you again! My wife asked me what I would have done if she caught up to me again. I said I would have tackled her! Just kidding, but it was motivation enough to keep her behind me for the rest of the race.

I had a race plan and forced myself to execute it to the letter. I have found that in the past if change my plan during the race it results in disastrous consequences. I kept going pretty strong, and never saw that 2hr pace bunny again. I started to slow down during the last 2 to 3k, but kept pushing and came in at 1:57:12, well under my goal time. I was extremely happy with the result. My wife came in at 1:51:10, she totally rocked it!

Huge thanks to all of the race volunteers and the Hamilton Police service for getting all of the runners through the route safely! And can’t forget all of the spectators cheering us on along the way.

Next up is the Disney World half-marathon in January. Looking forward to running with Mickey and friends.

Photo Tip: 
All of these races have photographers along the route so I decided to wear grey...about 18% gray, you know just in case they need some help in correcting white balance! OK - agreed it’s a lame tip, but proper colour balance is critical and you can’t argue with that.

Cheers!

DC

Sunday, September 23, 2012

I Broke a Cardinal Rule of HDR...But Really, It Wasn't My Fault


One of the cardinal rules of HDR photography is to always, always shoot with a tripod...and I always do, except for when I can't...or more importantly when I'm not allowed to.

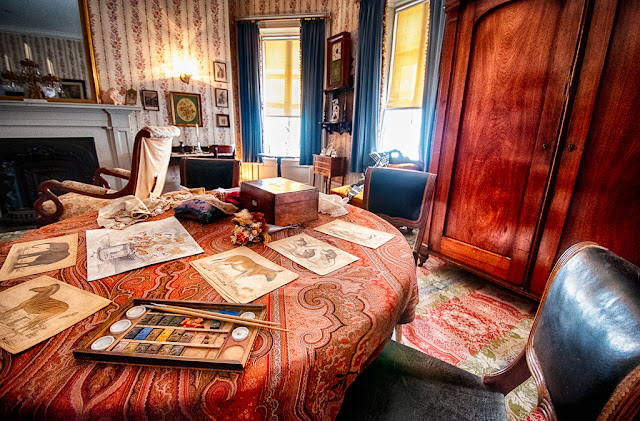
It's obvious that we use a tripod to have a stable platform, especially when shooting multiple exposures for HDR images because we want to minimize any camera movement so all those exposures will align properly in post. However, there are some really great places to shoot, usually inside, that will not allow you to use a tripod or a monopod. Dundurn Castle in Hamilton is one of these places.


I found myself there not too long ago and saw that they do regular tours, but they don't allow tripods (or monopods) as the place is over 175 years old. It's an historical site and preservation is critically important.


So I'm inside, with some really good natural light, but in a number of rooms it was a little spotty. Knowing that I was going inside I immediately thought HDR would be my best bet to draw out all of the tones that a single exposure would leave behind. But without a tripod I had to shoot handheld. This is where things got a little tricky.


I had to raise my ISO to 1600 and sometimes push it a little bit further so noise was going to be an issue. I was shooting a 5 exposure bracket and my wide open exposures were getting up to 1/10th and sometime 1/5th of a sec...yikes! Handheld at 1/10th and 1/5th? That for sure will cause some issues. I was shooting with the Nikon 10-24mm wide angle lens at the 10-12 mm end, as well as bracing myself to walls, doorframes or anything else I could find, so I was hoping that I would be able to get away with a few of those exposures.

I was pleasantly surprised find that I had a few that worked out pretty well. More than I was expecting. However, some were a little soft with the slower shutter speeds...oh well, it wasn't my fault remember?!?


I got to try out Nik Software's HRD Efex Pro 2 for the first time and I'm totally sold on it! I love the new features. Finishing was done with Viveza and Color Efex Pro.

Cheers!

D