Showing posts with label Review. Show all posts

Monday, August 5, 2013

Giving the SmugMug Another Chance


I've been playing around with the new SmugMug site...and I like it! It still has a few things that could function better, that I talk about below, but it's a vast improvement over the old site. 

I used to use Smug Mug a couple of years ago, but shut it down as it was so cumbersome to manage, and the format was little pedestrian.

Now it's so much easier to use with the new features launched last week. Here are few of my favourites:

New Design Themes - very professional looking, especially the way your photos are automatically set up; you don't really have to think
Organization - really easy to re-sort and organize your photos, just a simple drag and drop
Content Blocks - relatively easy to customize your site; you can create your own page from a blank slate even within a Theme
Simple and Clean- the look and feel is simple and clean across the board
Mobile - looks great on a mobile device, and I also did some customization on my iPad

However, there were a few niggly things that drove me slightly nuts (SmugMug in case your listening):

It was a little difficult to figure how to do some things using the Help options. This is not due to lack of information, but rather the opposite with too much information, which makes is hard to sort through when you're looking for a quick answer. Thankfully it was +Trey Ratcliff to the rescue for me with his video giving a peek behind the kimono of how he set up his site. Thanks Trey!

Also, the Help link doesn't open in a new tab or window. I didn't realize this until I was 4 or 5 links deep in the Help section, found what I needed, but then realized that I had left my site a few exits back. I solved it by opening another tab myself after I realized this, but it's a pretty easy fix.

OK, you've just spent some time customizing your site and set up your menu, inserted a logo, and configured your social buttons. Then you decide to try a different Theme only to find that your logo, menu and social button settings didn't carry over. You have to configure each of them again in the new Theme.

I know this seems like a small thing, but once you have these foundational pieces configured it would be nice if they carried over into the different Themes so you don't have to duplicate effort.

As I said, pretty niggly things that I experienced, but overall SmugMug got a lot of things right here! My site link is below, and I'm going to keep playing with a few different designs. But I think it's time to give SmugMug another chance.

Cheers!

http://darrenclarkphoto.smugmug.com/


Sunday, September 2, 2012

ColorMunki To The Rescue!


First off, since I'm Canadian I have trouble spelling "colour" without the "u", but for the sake of getting the product name correct I'll go along with it...for now :)

As with many photographers I like to work as accurately as I can with my the colour of my images and that means having a properly calibrated display. I have been using a LaCie 321 display with the Blue Eye Pro calibration tool. Up until late last year I had no problems. Using an older Dell Win XP laptop things worked quite well.

What changed? Well, I moved over to a MacBook Pro. This is when I started to have some issues. The old laptop was connected with a DVI cable as that's what is native on the display; however, the Mac is now using the new Thunderbolt port. No problem, I just got the MiniDisplay Port to DVI adapter and the display works as it should, except for when it came time to calibrate. This is where the problems started.

As it was going through it's steps I kept getting an error at the monitor connection stage prior to measuring the colour patches. This was strange because the Test and Report feature was able to measure and report on the current settings without an issue. So it became troubleshooting time. Downloaded the updated software for the Mac OS, didn't work. Next I contacted LaCie and set up a service ticket and was pointed to a newer update as OS Lion was still new... it didn't work. It was interesting to note that this newer update was released about 6 months before Lion was launched... is it compatible with OS Lion? Who knows?

After a lot of back and forth with LaCie service I was told it was the Thunderbolt port that was not compatible with the DVI connection on the display as it could not translate the necessary information. Just for fun I tried calibrating the display on my laptop to see if that would work. Low and behold, I get the same error, which tells me that it's probably not the Thunderbolt connection issue as it was not in play. Anyway, the problem was never really resolved. I still think it's a software issue that was never made compatible for OS Lion. So basically it was either buy a new display or try a new calibration tool...both expensive options.

I decided that lesser of 2 evils was to try a new calibration tool first. If it didn't work then it would be time to get a new display, but I would still need a good calibration tool anyway.

Enter ColorMunki Photo... problem solved! It worked regardless of the Thunderbolt adapter connection issue.

I can't remember an easier piece of software, and hardware, to use. Set-up was dead simple and it walks you through all of the steps required to calibrate your display and create a printer profile. You have the option of letting the program set all of the settings for you, or you can take the more advanced route of configuring it to your own settings. A nice feature of the advanced route is that you can use the ambient  light sensor to take a luminance value of your work space and identify the appropriate luminance level for your display.

Did I mention that it worked? Even with the same adapter through the Thunderbolt port? Needless to say I was pretty happy. Granted the ColorMunki Photo is not cheap, but it's still only a 1/3 the price of a decent display. So I was hedging my bets on this one and it turned out in my favour.

Now, this highlights an ever present issue of upgrading your gear whether it's a new computer or an OS update. I expected that I would need to update a lot of programs and drivers for some older gear when I moved to a Mac, and in some cases just bite the bullet and buy the latest (as in this case). You really need to do a lot of research when upgrading so that you know what will work, but especially what won't work.

So if you're in the market for a display calibration tool I would highly recommend the Color Munki. You can check them out here www.colormunki.com

Cheers!

DC

Saturday, February 25, 2012

Snapseed for iPad - Quick Review

I thought that I would do a quick overview of Nik Software's Snapseed app for the iPad. I was a late adopter of the iPad 2; however, I had heard a lot of good things about Snapseed. It was Apple's iPad app of the year for 2011, which says a lot. But even without that accolade the fact that it's from Nik Software should tell you that this is one powerhouse of an app. It's normally $4.99 in the App Store, but I was lucky enough to spot a few Twitter posts on Valentines Day indicating that it was free for on that day only, so grabbing it was a no brainer. But still, $4.99 is a steal for what you get.


So here's a quick overview of what you'll find with Snapseed:

Auto Correct - no thinking required - auto colour and contrast adjustments
Selective Adjustments - talkin' bout control points here...on your iPad... very cool... brightness, contrast and saturation (wish there was a structure option here, too, but alas not yet)
Tune Image - brightness, ambiance, contrast, saturation and white balance
Straighten - self explanatory
Crop - self explanatory
Details - sharpening and structure (both are global adjustments - would love to see these as selective adjustments in a future update)
Black and White - brightness, contrast and grain (combine this with the selective adjustments and you get a mini Silver Efex Pro 2)
Vintage Films - variety of styles and textures along with adjustments for brightness, saturation, texture strength, centre size (vignette), style strength
Drama Filter - variety of styles with filter strength and saturation adjustments
Grunge Filter - styles that range from 0 to 1501 plus texture options, centre size (vignette) that can be placed anywhere also includes brightness, contrast, texture strength and saturation adjustments
Centre Focus - like a vignette with blur where you can control the size and placement
Frames - variety of frames with width and offset adjustments
Tilt Shift - simulates a tilt shift lens

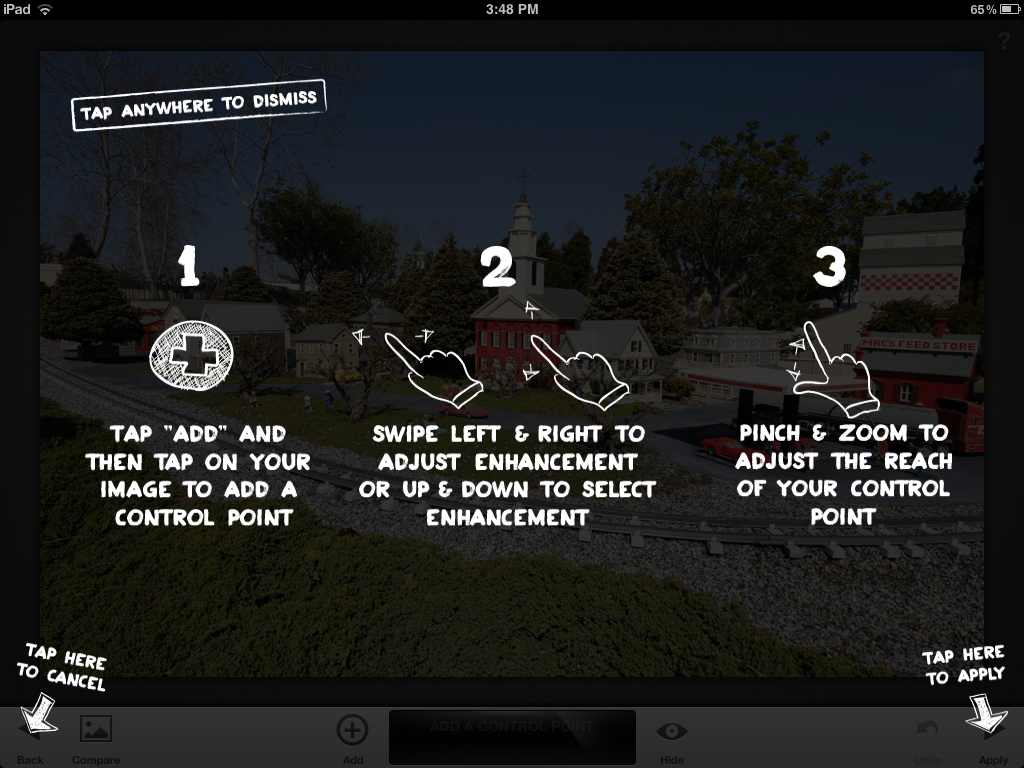
Overall, it's an extremely powerful and very intuitive app. When you launch each filter you get an opaque screen overlay with the instructions and everything uses normal iPad screen gestures. There's a ? in the upper right hand corner of each filter if you need to pull up these instructions again, but after a few times through it you'll be a pro.


Snapseed is a great app for travelling light. Last weekend I was down near San Diego to visit family and took my camera along with my iPad. We spent some time at Legoland (the family that is, but my camera did accompany us) and I grabbed some shots of the miniatures. I spent some time after that playing around with the myriad of creative options that Snapseed offers. Below are few examples that are amazing on two levels: 1) that Snapseed is an awesome app; and 2) that all this stuff was built with Lego!

Original file (jpeg version of the untouched RAW file - that's right, it works with RAW files)


After Tune Image and Selective Adjustments


Vintage Filter + Frames


Original file


Black and White + Frames


Enjoy!

DC

Sunday, February 5, 2012

Think Tank Photo Airport International v2.0 Rolling Bag Review

Okay, so this week I thought I would take a different approach and throw out my first ever video review, and what better than to take a look at the awesome Think Tank Photo Airport International v2.0 rolling case. You also get a change to see what's in my bag.


Enjoy!

DC