Monday, August 8, 2011

Playing With Light... And Guitars

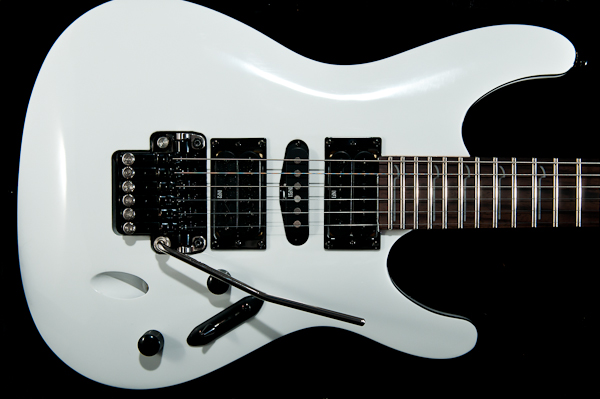
Learning how to light things can be fun and challenging both at the same time. However, it allows you the opportunity to try different things and work on some creative problem solving. I spent some time recently playing with a few different lighting setups at home and decided to put my guitars in front of the lens. There are a few challenges to deal with right off the bat such as their shape, and that fact they're shiny (i.e., they reflect light) so placement of your lights can be tricky. By making small adjustments you can find something that works.
 
My electric is a white Ibanez S540, which I wanted to place on a black background to put the focus on the guitar itself. I had some trouble with how I was going to do this because guitars don't sit very flat. I wanted to avoid using a guitar stand as I didn't want to do a lot of post work in Photoshop; I wanted to keep it simple in Lightroom. I decided to leave it in the case since it has a nice plush black interior, which would be easy to darken with a little bump of the Blacks slider in Lightroom. It was on the floor so I was hanging over it shooting down. I went for the Joe McNally approach on this and used all of the lights I had, which was really only 3 SB900s. One just above, one on the left and the third I placed by the headstock and skimmed it across to get some glint off of the strings. Post was all done in Lightroom.


For my acoustic I decided that leaving it on the stand was going to be easier so I placed it in front of a black background. I used a tight crop in camera to focus on the shape. This composition also allowed me to avoid having to remove bits of the stand in Photoshop as they were completely out of frame. I went minimal for this and used only one SB900 through a 24" Lastolite Ezbox on camera left. Post started in Lightroom then tripped over to Photoshop for some cleanup work, then back to light room for some finishing.


The amplifier was a similar set up to the acoustic. Placed it on a black backdrop with one SB900 through the same 24" Lasotilite Ezbox overhead on the left positioned almost like a shower head. My goal was to only light a portion of it and try and let the light fall off towards the bottom right. Post was all done in Lightroom.


Cheers!

DC

Saturday, July 30, 2011

Catch Me Over at 500px.com


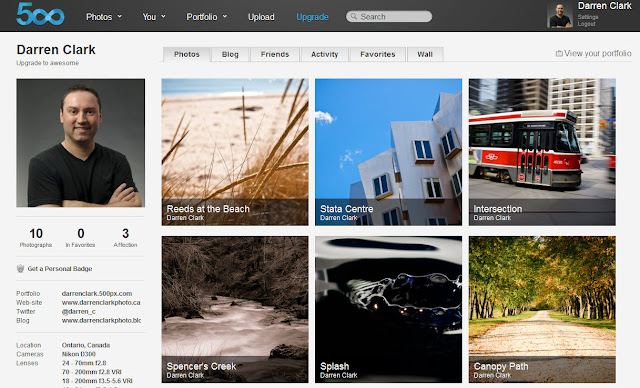
Following up from last week's post... I now have my little spot over at 500px.com. Drop by at http://500px.com/darrenclark and have a look. If you're already a member then hit the follow button, and if you like what you see then don't hesitate to drop a vote for me.

Cheers!

DC

Sunday, July 24, 2011

How Critical Are You About Your Favourites Collection?

First question, do you have a collection of your favourite photos? You know the ones you rank with a 5 star, or drop into a "favourites folder". I was sort of using the star ratings along with Collections in Lightroom.

Second question, how many photos do you have in your favourites collection? Over the years I have shot a lot of photos, and selected a lot of favourites; mine was over 200. If I liked it I dropped a 5 star rating on it or moved it to my favourites collection.

Third question, if you were asked to choose your top 10 photos, only 10, could you? Ummm, can I get back to you on that?

This is an exercise that I went through last weekend. It was driven by a number of blog and Twitter posts I have been reading about 500px.com. A photo sharing site that has been getting a lot of publicity lately. My first reaction, before seeing it, was it's just another Flick type site, but when I had a look I was totally blown away. This is definitely not another Flickr. Now don't get me wrong here, there are a lot amazing photos and creative folks on Flickr, but it is also saturated with everyday snapshots. 500px.com is site by photographers for photographers.

A tour of the site had me thinking how some of my work would fare, but that meant deciding what photos would make the cut to be considered anywhere close to what I was seeing from others. That prompted the question I posed above; if you could choose only 10, could you? So I went on a search for my all time top favourites, or as I'm referring to them now my "Portfolio Worthy" photos. To do this I created a new star rating system and set up some new Smart Collections in Lightroom to help, it looks something like this:


1 Star = All crap; delete at will... and fast (i.e., the blurry, the bad and the ugly).

2 Stars = Possibility of potential, but don't hold your breath. They're not exactly in the "delete" cross hairs, but would require a lot of work to bring them up a level or two.

3 Stars = Quality photo, needs some work to get it where I want it, but it could become a favourite.

4 Stars = My personal favourites, (key word here is "personal"). I like everything about them for various reasons. This is where I may have hundreds of photos, and that's ok for me.

5 Stars = This is it, the "Portfolio Worthy" group, the top of my favourites...my answer to the third question I asked above.

I started with my current collection of favourites and began to re-rank them based on my new system. This was not an easy exercise because I like a lot of my photos, as I'm sure you like a lot of yours, too. However, I was trying to be extra critical to force myself to pare down to 10. I couldn't do it! 10 was such a low number and there were a lot of photos that I liked! I ended up with 25 in my "Portfolio Worthy" collection so I decided that 10 was just an unrealistic number to begin with. However, starting with such a low number can really focus you on being very critical and selective, which was what I was aiming for.

Now, I'm not saying that you need to only have 10 photos in your portfolio. As I mentioned this was a truly unrealistic number. But the exercise was about being extremely critical about what you think your best work looks like, and this is the way I approached it.

So my next step is to get these photos up over at www.500px.com, which I will be doing in the next couple of days, and see what others think. It could be good, it could be bad, or it could be ugly. I'll post again once I'm up and running there.

Cheers!

DC

Sunday, July 17, 2011

Backup, Backup and Backup

At some point in time we have all heard about someone who lost all of their data due to a hard drive crash. I've never had this happen to me, yet, but it could; anything is possible. So today I'm going to share with you my backup strategy.

Why do it? Simple, insurance. I may never have a problem, and may never need to go back and use any of the backup copies to recover data, but what if? It's pretty easy to do and there are a lot of inexpensive ways to do it, but if you want to spend more money there's no shortage of solutions there either. What you need to decide is how you want to do it, and how much you want to spend.

For me, I think a really simple backup strategy looks like this:

1) Backup of main files on one drive at your main location (i.e., home or office).

2) Backup that first drive onto a second drive - store this second drive in another part of you home or office so it's close if you need it.

3) Backup a third drive and store that one off site at an alternate location. Why is this important? Because your hard drive might not crash, it could be damaged in a fire, flood, hurricane, tornado, etc., or stolen after a break in. It's another layer of protection.

My focus here is more on a simple home based backup strategy; however, I think you can still apply the same principles to small/medium sized business. Me, I went for the smaller less expensive set-up. I work from a laptop and used to store all of my images on the hard drive with only 1 external drive as a backup. I switched my configuration for 2 reasons 1) my laptop hard drive was getting full; and 2) I had read a couple of blogs about others' experiences with recent drive failures. So here's what my set-up looks like based on my suggestions above:

1) Western Digital My Book Mirrored 2TB RAID configured to RAID 1 - this gives me 1TB storage mirrored on 2 disks - the My Book is also where my main source image files are stored. My Lightroom catalogs still reside locally on my laptop and get backed up to the My Book along with a few other folders. Because of the RAID 1 configuration I already have some protection here. If one drive fails I can replace it and keep on going.

2) The My Book gets backed up to an older Seagate 250GB Free Agent drive - this was my first backup drive from a few years ago so it still serves me well at this point. It's only 250GB so if it gets full I'll just replace it; external drives are pretty cheap now.

3) Another copy is made to a small portable Seagate Go Flex 500GB - I store this one off site.

All of these drives come with their own backup software, but I use a program call Second Copy, which works really well for me. You have a lot more control over your backup jobs and it's really easy to use. If you're using a Mac, then you already Apple's Time Machine, which I understand works very well, too.

As I mentioned before, you don't need to spend a lot on some uber sophisticated system; my set-up cost less than $400. External hard drives now are quite cheap. You can get portable 1TB drives for under $100.00. Grab a few of these and make multiple copies. If you want to spend more you can look at multi-drive RAID units that have various configurations (i.e., 2, 4 or 8 drive bays) depending on what you need. If you head in this direction I suggest that you consider one with hot-swappable drives like a Drobo or G-Safe. Can't forget that there are also a number of online storage solutions like Carbonite or CrashPlan.  Tech guru (and all around nice guy), Terry White, recently wrote about CrashPlan on his blog.

So there you go. This is what I do, and it works for me. As I mentioned earlier there are many ways to do this, all you need to do is decide what you think is going to work best for you. If you haven't yet thought about your own backup strategy, then I hope I have shed some light on it for you.


Cheers!

DC